
How to setup All in One SEO Pack Plugin in WordPress-:
First, install and activate the All In One SEO plugin on your site. Its basic version is free and offers very limited features while the Pro version provides video sitemaps, eCommerce SEO, 1-year professional support and many other additional features. So let’s start the All in One SEO Pack Plugin settings.
After activating the plugin, click All in one SEO >> General settings. Here you will see many settings which can scare you. But don’t worry, you can easily configure the settings of All in One SEO Pack Plugin by following this tutorial.
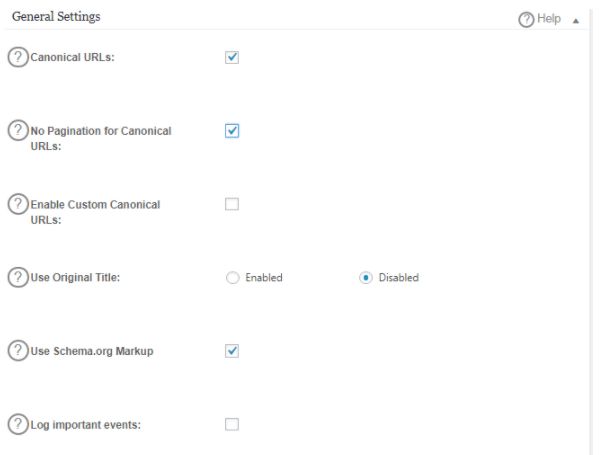
1. General Settings-:
Here first you need to set up canonical URL. Canonical URLs eliminate duplicate content issues on your site and prevents Google penalties.
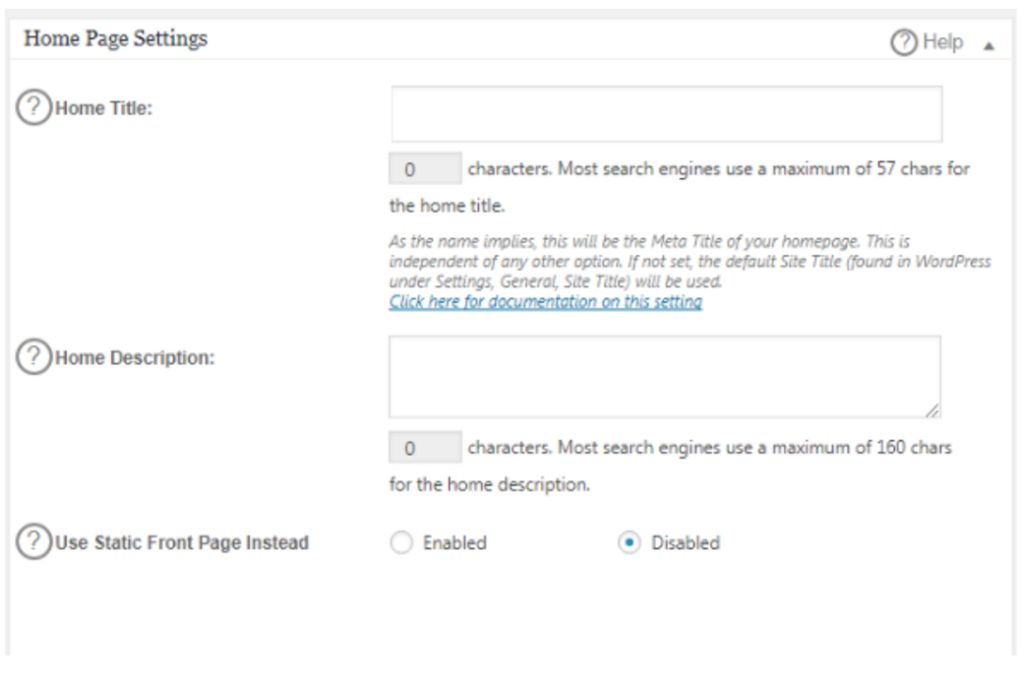
2. Home Page Settings-:
In this section, you will need to add title and meta description for the homepage of your site. Type your meta description in 160 characters. Also, use keywords in your meta description to get better results.
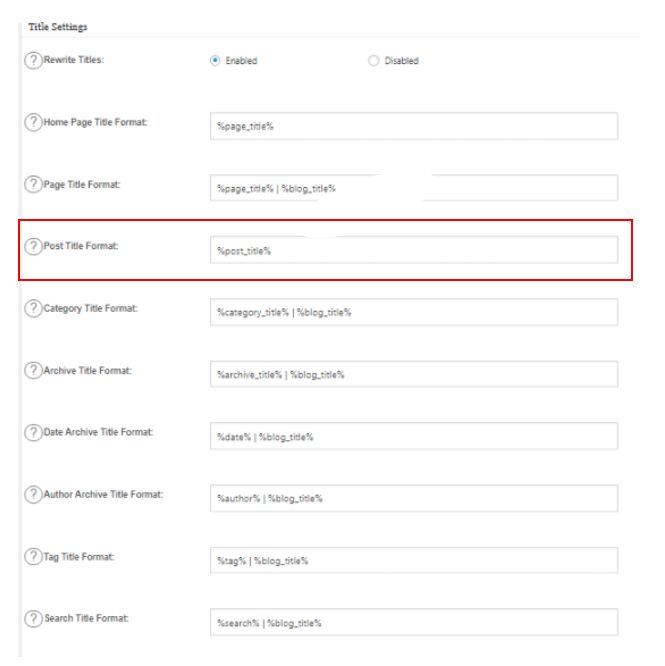
3. Title Settings-:
Remove% blog_title% from your Post title. As you can see in the screenshot.
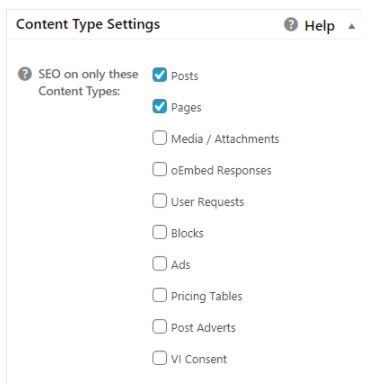
4. Content-Type Settings-:
This section allows you to choose which content types you want SEO to enable. I would suggest you just check the box of Posts and Pages.
5. Webmaster Verification-:
This section allows you to verify your site in Google Webmaster tool, Bing webmaster tool, and Pinterest.
6. Google Settings-:
You can easily add Google Analytics ID here to track your blog.
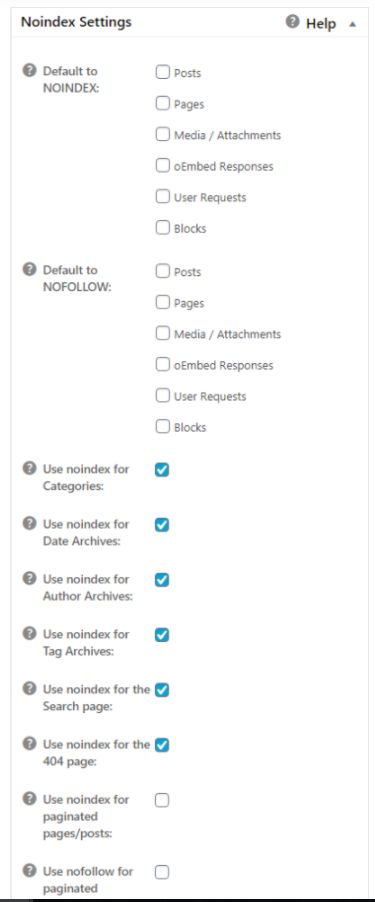
7. Noindex Settings-:
This is the most important settings for your blog. If you make a slight mistake here, it can severely affect the search visibility of your website. Here you need to set Noindex for your archive pages as these pages cause duplicate content problems in the search engine. Also, Google does not consider it as a quality page. These act as user-navigation on your site, but they have no value in search engines.
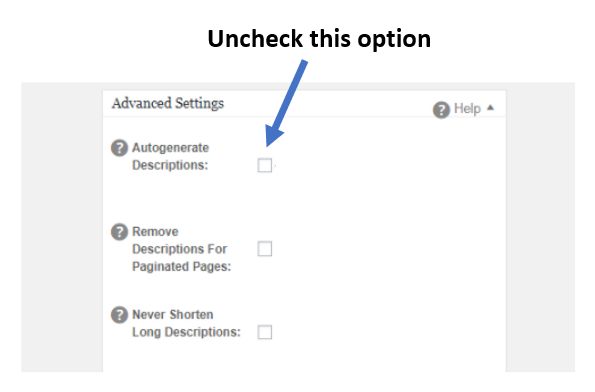
8. Under Advanced Settings-:
Advanced settings, uncheck the Auto-generate descriptions option and write the Meta description yourself.
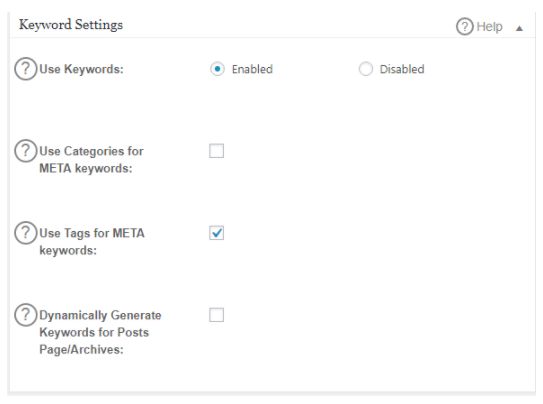
9. Keyword Settings-:
Many SEO experts believe that the meta keyword tag is useless and some believe that they still work perfectly. However, this option is disabled by default in the All in One SEO Pack Plugin. If you want to use the keyword, you can enable it from here. Congratulation! You have successfully configured the settings of the All in One SEO pack plugin on your site.
How to Optimize Title and Meta Description in All in one SEO Pack-:
In the post editor, scroll to the page and go to the All in One SEO pack section. Here you will see some options like Titles, Description, Keyword, NOINDEX and NOFOLLOW.
1. Title
When you write a post, through this title you can decide how you want your post to appear to search engines and readers. Also, you can make your post title search-friendly. The default title, which Reader will see, and when you see All in one SEO ?? Let’s enter the title in the title option, it will be used for the search engine.
2. Meta Description
A meta description is a short description of your post. This helps increase the CTR on your post. Always write a meaningful and good meta description and don’t forget to put your target keyword in it. This plugin supports 160 characters.
If you like my work, Please Share on Social Media! You can Follow WP knol on Facebook, Twitter, Pinterest and Quora for latest updates. You may Subscribe to WP Knol Newsletter to get latest updates via Email. You May also Continue Reading my Recent Posts Which Might Interest You.